Desert Mounted Corps
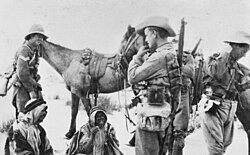
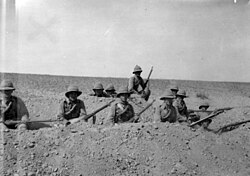
The Desert Mounted Corps was a specialized army corps of the British Empire, active from August 12, 1917, to June 7, 1919. Operating as part of the Egyptian Expeditionary Force, this formidable force combined cavalry, yeomanry, mounted infantry, and horse artillery to conduct high-mobility warfare across the challenging terrains of the Sinai, Palestine, Jordan, and Syria.
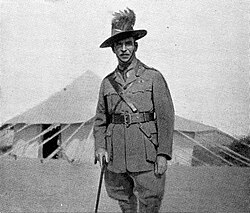
Under the leadership of Lieutenant-General Harry Chauvel, the corps played a pivotal role in the Sinai and Palestine Campaign, utilizing the speed and flexibility of mounted troops to outflank Ottoman forces and secure strategic objectives in the Middle East.
Key Facts
- Active Period: August 12, 1917 – June 7, 1919.
- Commander: Lieutenant-General Sir Harry Chauvel.
- Primary Role: Mounted warfare, including reconnaissance and rapid pursuit.
- Composition: A diverse mix of Australian Light Horse, New Zealand Mounted Rifles, British Yeomanry, and the Imperial Camel Corps.
- Major Theaters: Palestine, Transjordan, and Syria.
Formation and Organization
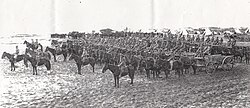
The corps underwent significant reorganization in June 1917 to optimize its operational efficiency. On June 21, the Imperial Mounted Division was renamed the Australian Mounted Division. Shortly after, on June 26, the Yeomanry Mounted Division was formed, comprising the 6th, 8th, and 22nd Mounted Brigades.
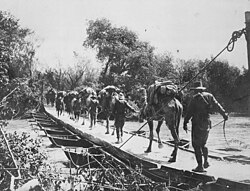
Additionally, the 7th Mounted Brigade and the Imperial Camel Corps Brigade—specialized units trained for desert endurance—served as corps troops, providing essential support across the arid landscape.
The 1917 Campaign: From Beersheba to Gaza
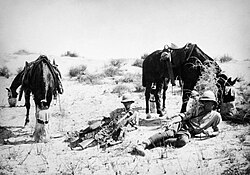
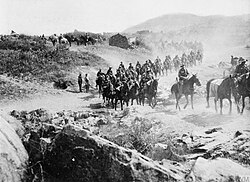
The corps' operational capabilities were most evident during the capture of Beersheba. On October 31, 1917, the ANZAC Mounted Division launched a coordinated strike. While the 2nd Brigade secured Tel el Sakaty and the New Zealand Brigade moved toward Tel el Saba, the Australian Division reconnoitered the town from Khashim Zanna hill.
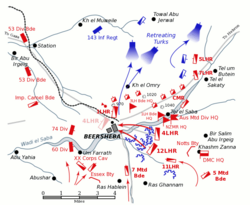
Despite heavy Turkish defenses that forced the 7th Brigade to dismount, the 2nd Brigade successfully cut the road to Jerusalem by 13:30. Once Beersheba was secured, the corps shifted focus to Gaza. By November 2, the front line was penetrated, and Turkish defenders began to withdraw.
The pursuit of the retreating forces was hampered by a critical lack of water. Although Beersheba had seven wells, the Turkish forces destroyed five during the battle, limiting the corps' ability to maintain momentum. Nevertheless, the ANZAC Mounted Division managed to capture the Umm el Ameidat train station, seizing 400 prisoners and significant stores of ammunition.
The Mughar Ridge and the Push to Jerusalem
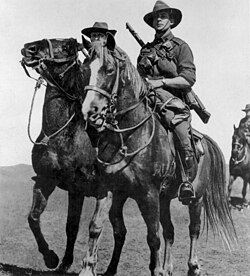
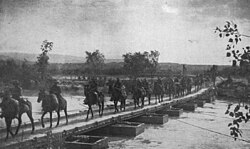
By November 10, the 1st Light Horse Brigade captured a vital bridge at Jisr Isdud. To allow infantry forces to catch up, General Allenby ordered the mounted troops to hold their positions. In a daring night operation on November 11-12, the 2nd Light Horse Regiment swam their horses across the river to capture Tel el Murre hill with a bayonet charge, facilitating the advance of the 52nd and 75th Divisions.
1918 Operations: Jordan Valley and Es Salt
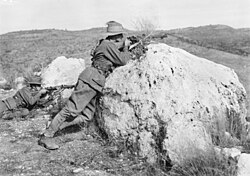
Following a period of rest and refit in Gaza, the corps returned to action in February 1918. The ANZAC Mounted Division and the 60th (London) Division advanced toward the Jordan Valley, capturing Jericho by February 21. This movement placed British forces in a position to monitor Turkish bridgeheads at El Ghoraniyeh and Wadi el Auja.
In April 1918, the corps launched a raid to destroy Turkish forces based at Shunet Nimrin. While the attempt to seize the Jisr el Damieh bridge failed due to strong Turkish defenses, the 3rd Light Horse Brigade successfully captured the town of El Salt on April 29. This operation resulted in the capture of the Fourth Army headquarters and 300 prisoners.
Order of Battle Summary
The Desert Mounted Corps was a complex organization that evolved between 1917 and 1918, integrating various national and specialized units.
| Division/Brigade | Key Components | Specialization |
|---|---|---|
| ANZAC Mounted Division | 1st & 2nd Light Horse Brigades, NZ Mounted Rifles | Mounted Infantry/Rifles |
| Australian Mounted Division | 3rd & 4th Light Horse Brigades | Mounted Infantry |
| Yeomanry Mounted Division | 6th, 8th, & 22nd Mounted Brigades | Cavalry/Yeomanry |
| Imperial Camel Corps Brigade | 1st, 2nd, 3rd, & 4th Battalions | Desert Camel Warfare |
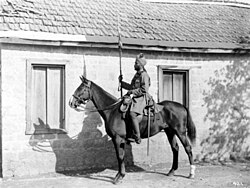
| 4th & 5th Cavalry Divisions (1918) | Indian Cavalry, Yeomanry, Lancers | Traditional Cavalry |
Frequently Asked Questions
Who commanded the Desert Mounted Corps?
The corps was commanded by Lieutenant-General Sir Harry Chauvel, who led the force through its most critical engagements in the Sinai and Palestine Campaign.
What was the significance of the Battle of Beersheba?
The capture of Beersheba was a strategic victory that allowed the British Empire to penetrate the Turkish line, secure vital water sources, and eventually lead to the fall of Gaza and the advance toward Jerusalem.
What was the role of the Imperial Camel Corps?
The Imperial Camel Corps provided specialized mobility in deep desert environments where horses struggled, serving as corps troops for reconnaissance and assault.
How did water affect the corps' operations?
Water was a primary strategic constraint. Operations were frequently curtailed or delayed based on the availability of wells, as seen after the capture of Beersheba when the destruction of wells limited the pursuit of Turkish forces.
Which nations contributed to the Desert Mounted Corps?
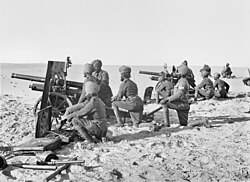
The corps was a multinational force of the British Empire, including troops from Australia, New Zealand, Great Britain, and India.