Battle of Belmont: A Pivotal Engagement of the Second Boer War
The Battle of Belmont, fought on November 23, 1899, was a significant early clash of the Second Boer War. It pitted the British forces, commanded by Lord Methuen, against Boer defenders entrenched on the Belmont kopje—a kopje being a small, flat-topped hill common in South Africa. While the engagement resulted in a British victory, it highlighted the severe challenges of intelligence and mobility that would plague the British Army throughout the conflict.
Key Facts
- Date: November 23, 1899
- Location: Belmont kopje, Orange Free State
- Outcome: British victory
- British Strength: 8,000 troops and 16 field guns
- Boer Strength: Approximately 2,000 men
- British Casualties: 75 killed, 233 wounded
- Boer Casualties: 83 killed, 20 wounded, 30 captured
Strategic Background
At the onset of the Second Boer War, Boer forces had besieged British garrisons at Ladysmith and Kimberley. To break these sieges, General Sir Redvers Buller dispatched a 40,000-strong Army Corps to South Africa. Lieutenant General Lord Methuen was specifically tasked with leading the 1st Division to relieve the Siege of Kimberley.
Methuen's strategy relied on advancing along the Western Railway from the Orange River to Kimberley. This route was chosen to maintain a secure supply line and facilitate the evacuation of civilians, as the region suffered from a critical lack of fresh water and pack animals. However, the British lacked sufficient cavalry for effective reconnaissance, leaving them blind to the exact strength and positioning of the Boer forces, who conversely had detailed intelligence on the British advance.
The Prelude to Conflict
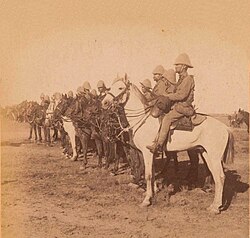
As the British force moved toward Belmont, reconnaissance by the 9th Lancers and Rimington's Guides spotted Boer activity on a nearby kopje. By the time Methuen reached Thomas' Farm, two miles south of Belmont, his vanguard came under fire. British artillery responded with shelling, and the army bivouacked for the night, preparing for a morning assault.
Methuen's plan focused on capturing a series of heights: Table Mountain and Gun Hill to the south, followed by a push toward Sugar Loaf Hill, Razor Back, and the dominating Mount Blanc.
The Assault on Belmont Kopje
Night March and Tactical Errors
The British attempted a surprise night march starting at 2:55 AM. The Guards Brigade was intended to outflank Gun Hill, while the Ninth Brigade targeted Table Mountain. However, due to faulty maps and poor reconnaissance, the troops found themselves marching directly into the front of the Boer positions rather than flanking them.
The Fight for the Hills
At approximately 3:55 AM, the Grenadier Guards launched costly frontal assaults on Gun Hill and the unexpectedly discovered Grenadier Hill. Despite the heavy fire, they secured the positions through hand-to-hand combat. Simultaneously, the Scots Guards captured the other side of Gun Hill and used captured Boer ponies to storm the south side of Table Mountain.
As the battle progressed, the Coldstream Guards encountered unexpected resistance from Sugarloaf and Razorback hills. To support them, the Naval Brigade deployed 15-pounder guns and a 4.7-inch Naval Gun nicknamed "Joe Chamberlain." Through a combination of artillery fire and infantry charges, the British eventually secured these positions, preventing Boer reinforcements from arriving via the road to Ramdam and Jacobsdal.
The Final Push for Mont Blanc
By 6:00 AM, Lord Methuen shifted his focus to Mont Blanc. The Guards Brigade attacked the southern and southeastern faces, while the Ninth Brigade assaulted the eastern face. By 6:30 AM, the Boer forces, facing a multi-pronged charge and artillery support, retreated on their ponies.
The engagement officially ended around 10:00 AM. While the British held the field, the victory was marred by the brutality of close-quarters combat and the inability of the Naval Brigade to move their heavy guns up the steep slopes of Mont Blanc.
Battle Summary
| Category | United Kingdom (British) | Boer Forces |
|---|---|---|
| Commanders | Lord Methuen | Jacobus Prinsloo |
| Troop Strength | 8,000 | 2,000 |
| Artillery | 16 field guns + Naval guns | Not specified |
| Killed | 75 | 83 |
| Wounded/Captured | 233 wounded | 20 wounded, 30 captured |
Aftermath and Analysis
The Battle of Belmont was a tactical victory, but it revealed systemic failures in the British military approach. Lord Methuen later expressed a deep detestation for the war in personal correspondence, reflecting on the human cost of the engagement. Historians note that the high British casualties were primarily the result of poor field intelligence, a lack of mobility, and the absence of accurate, large-scale cartography.
Frequently Asked Questions
Why did the British suffer high casualties despite their numerical advantage?
The high casualty rate was largely due to poor reconnaissance and faulty maps, which led the British to conduct costly frontal assaults against entrenched Boer positions instead of successfully flanking them.
What was the primary objective of Lord Methuen's advance?
Lord Methuen was tasked with breaking the Boer siege of Kimberley and evacuating civilians from the city.
What role did the Naval Brigade play in the battle?
The Naval Brigade provided critical heavy artillery support, including the use of 4.7-inch guns to suppress Boer positions on the hills.
How did the Boers manage to retreat so effectively?
The Boers utilized ponies for high mobility, allowing them to retreat quickly from their positions once the British infantry closed in for hand-to-hand combat.
What is a kopje?
A kopje is a small, isolated hill typical of the South African landscape, which the Boers used as natural defensive fortifications during the war.