Insect Pins and Specimen Mounting Techniques
In the field of entomology, the proper preservation of specimens is critical for long-term study and taxonomic accuracy. The primary tool used for this process is the insect pin, a specialized needle designed to secure an insect in place while allowing researchers to handle the specimen without touching the fragile body. Proper mounting ensures that key morphological features remain visible and that the specimen is protected from physical damage during storage.
Modern entomological pins are typically 38 to 40 millimeters long. While older pins were made of brass or silver, these materials were prone to corrosion upon contact with insect tissues. Today, professionals use stainless steel or nickel-plated brass with white or black enameling to ensure durability and stability over decades of storage.
Key Facts
- Standard Sizes: Pins range from 000 (thinnest) to 8 (thickest), with size 2 being the most commonly used.
- Materials: Stainless steel is preferred for long-term museum storage to prevent corrosion.
- Pinning Convention: Specimens are pinned to the right of the midline to preserve the symmetry of the left side.
- Staging: Small insects are often "double-mounted" using a smaller pin (minuten) and a support block.
- Adhesives: Canada balsam is a recommended soluble adhesive for carding specimens.
Types of Entomological Pins
Standard Insect Pins
Standard pins are designed to accommodate multiple data labels and allow for easy manipulation using entomological forceps (curved tweezers). Most follow a numbering system where 000 is the smallest diameter and 8 is the largest. Size 2 (0.46 mm in diameter) is the general standard, followed by sizes 1 and 3. For exceptionally large beetles, size 7 pins are used; these are extra-long (52 mm) and significantly stronger than size 6.
Micropins and Minuten
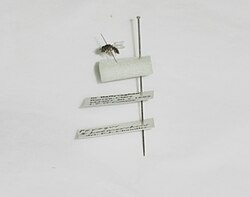
For very small specimens, micropins (10–15 mm long) are utilized. A specific type of headless micropin, known as a minuten, is typically made of stainless steel and measures 12 mm. These are rarely used alone and are instead used for double-mounting, where the insect is fixed to the minuten, which is then pushed into a support block mounted on a larger standard pin.
Specimen Mounting Methods
Direct Pinning
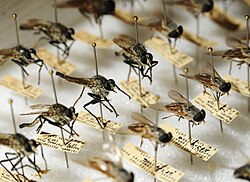
Direct pinning involves inserting the pin vertically through the thorax of the insect. To avoid destroying critical diagnostic characters on both sides of the body, the pin is inserted to the right of the center line. This ensures that at least one side of the thorax remains completely undamaged for study.
Point Mounting
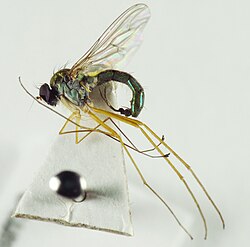
When an insect is too small for direct pinning, a point is used. A point is a small, triangular piece of white card produced by a point punch. A standard pin is inserted through the broad base of the triangle, and the specimen is glued to the tip. The tip may be bent to ensure the insect's body remains horizontal while the pin stays vertical.
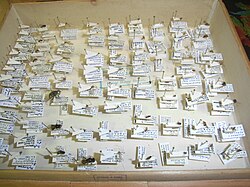
Carding
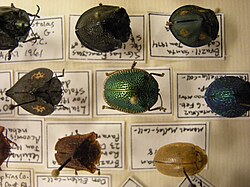
Carding is frequently used for Coleoptera (beetles) and Hemiptera (true bugs). The insect is glued to a rectangular piece of acid-free Bristol board. While convenient, this method can obscure ventral features necessary for taxonomic study. Therefore, it is recommended to use soluble adhesives, such as Canada balsam, so the specimen can be removed if necessary.
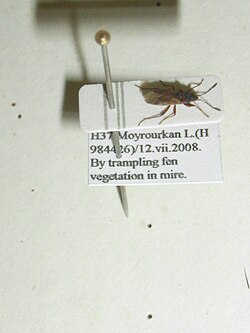
Staging (Double Mounting)
Staging is the process of mounting a specimen on a smaller support, which is then held by a full-sized pin. This is often achieved by using a minuten pin driven into a "stage" made of plastic foam or dried plant pith. The stage is positioned on the main pin (usually a size 3) at a height that matches directly pinned insects, providing a consistent level for viewing and leaving room for labels below.
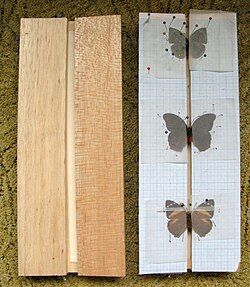
Summary of Mounting Tools and Techniques
| Method | Tool Used | Best For | Key Advantage |
|---|---|---|---|
| Direct Pinning | Standard Pin (000-8) | Medium to Large Insects | Fast and secure |
| Point Mounting | Triangular Card Point | Small Insects | Preserves thorax integrity |
| Carding | Acid-free Bristol Board | Beetles and Bugs | Stable presentation |
| Staging | Minuten Pin + Support | Very Small Insects | Reduces specimen damage |
Frequently Asked Questions
Why are insects pinned to the right of the midline?
Insects are pinned to the right to ensure that the left side of the specimen remains undamaged. This allows taxonomists to examine the morphological characters of at least one side of the thorax without interference from the pin.
What is the difference between a micropin and a minuten?
While both are small, a minuten is specifically a headless micropin (usually 12 mm long) used primarily for double-mounting or staging specimens.
Why is stainless steel preferred over brass or silver?
Brass and silver can corrode when they come into contact with the chemicals and tissues of an insect body. Stainless steel is chemically stable, making it ideal for long-term museum preservation.
What is the purpose of a staging block?
A staging block (made of pith or foam) acts as an intermediary support. It allows a very small insect on a minuten pin to be elevated to the same height as larger pinned specimens, facilitating easier handling and labeling.
Which adhesive is recommended for carding insects?
Canada balsam is highly recommended because it is an effective adhesive that remains soluble, allowing the specimen to be removed with solvents if further study is required.